
Are you a first time flyer looking for the best airport tips? I’ve got you covered with the ultimate guide for first time flyers!
Disclosure: This post may contain affiliate links, which means we’ll receive a commission if you purchase through our links, at no extra cost to you. Please read full disclosure for more information.
Whether you’re flying on a plane for the first time or if it’s your first time flying in forever, these major airport tips will be useful to know before your next flight!
We’ve traveled to over 50 countries, so that translates to a LOT of time spent flying.

We’re here to equip you with an essential guide for first time flyers to ensure a smooth and enjoyable journey from before takeoff to after landing.
You’ll be ready to breeze through your travels in no time after reading this flying for the first time step by step guide!
1. How to Decide on a Holiday Destination
First things first, do you have a specific destination in mind? If you’re a first time flyer, here’s a crucial tip: flexibility is key.
Being flexible with your destination opens up a world of possibilities. Literally.
However, it can also make the decision-making process a bit more challenging. Many places offer similar experiences but differ in expenses, which can play a role in determining your final choice.
To help you make an informed decision about your holiday destination, consider the following steps:
- Determine your budget
- Consider the time of year
- Evaluate safety and security
- Consider how the long the flight will be
- Let flight deals guide you
Let’s go into each of these into some more detail…
Determine Your Budget
Start by setting a budget for your trip.
Consider how much you are willing to spend on accommodation, activities, meals, and transportation including flights.
This will help you narrow down your options and make cost-effective choices.
Identify Your Travel Preferences
Take a moment to reflect on what you enjoy doing most on vacation.
Are you looking for relaxation on a pristine beach, adventure in the mountains, exploration of vibrant cities, or immersion in local cultures?
Identifying your preferences will help you narrow down the types of destinations that align with your interests.
Consider the Time of Year
Think about the timing of your travel. Research the climate and weather conditions of potential destinations during your desired dates.
This will help you select a place that offers favorable weather for the activities you plan to pursue.
Keep in mind that some destinations may surprise you with unique experiences and even non-traditional seasons.
During our trip to Iceland in April, we were lucky to experience the beginning of Iceland’s summer season. Remarkably, there were 17 hours of sunlight each day.

We specifically chose this time of year to make the most of the extended daylight and maximize our exploration of Iceland’s stunning landscapes.
If we had visited during their winter season, we would have encountered some days offering as little as four hours of sunlight.
This reinforced our decision to plan our trip during a time when daylight hours were more generous, allowing us to make the most of our Icelandic experience.
Evaluate Safety and Security
Check travel advisories and research the safety conditions of potential destinations.
Ensure that the place you choose has a good safety record and that you feel comfortable traveling there.
Trust your instincts and use common sense when assessing safety.
Consider How Long the Flight Will Be
If it’s your first time flying, you might want to take into account the duration of the flight when selecting your destination.
It’s understandable that you might prefer a closer location rather than embarking on a lengthy flight that takes you halfway across the world.
However, the choice ultimately rests with you, and it’s important to consider your comfort level and preferences.
Take into account factors such as jet lag, potential layovers, and your personal tolerance for extended travel times.
Let Flight Deals Guide You
If you’re open to it, allow flight deals to influence your destination choice.
In fact, it’s our primary method for deciding where to travel next!
When we stumble upon a tempting cheap flight and have the flexibility to take time off from work, we seize the opportunity without hesitation.
Letting flight deals dictate our destination has led us to incredible adventures and unexpected discoveries.

However, if you’re a first time flyer, the process of buying plane tickets might seem confusing at first.
You might find yourself wondering where to even start. The next tip is especially for you.
If you already have a specific destination in mind, the next tip will also help you find cheaper ways to fly there.
RELATED ARTICLE: What to Do in Doha Airport for 3 Hours
2. Know Where to Search for Plane Tickets
Many times an expensive flight will get in the way of you and your dream destination. Fortunately, there are various ways to find affordable options.
One such way is with Skyscanner, but there are many more options to explore.
To make your search easier, we’ve compiled a list of our top nine apps and websites that have consistently helped us discover incredible flight deals to over 40 countries.
These tools have enabled us to find budget-friendly flights, including options for first-class travel (if that’s more your style).
The best part? This resource is completely FREE to access when you sign up below!
So what’s stopping you from finding your next cheap flight and turning your travel dreams into a reality?
Explore these tools, compare prices, and head out on an adventure that won’t break the bank.
3. How to Book Your First Flight Directly
When it comes to booking your flight as a first time flyer, there are a few key considerations to keep in mind.
Whatever you do, book your flight directly with the airline.
Once you’ve taken some time to research different airlines and compare their prices, schedules, and services using the tools from the last tip, go to the airline’s official website to complete your booking.
Booking directly with the airline allows for direct communication between you and the airline’s customer service team.
If you have any questions, need assistance, or encounter any issues related to your booking, you can easily reach out to them for support.
The direct line of communication can help ensure a smoother travel experience.

Booking directly with the airline also provides more flexibility when it comes to making changes or cancellations to your flight.
If you need to modify your travel plans, such as changing your departure date or requesting a refund, it’s often easier to handle these requests directly with the airline.
Third-party websites may have their own policies and procedures, which can add complexity and potentially additional fees.
Booking directly with the airline often provides you with better customer protection and assistance.
In the event of flight disruptions, delays, or cancellations, the airline is typically responsible for rebooking you on the next available flight or offering compensation per their policies.
Dealing directly with the airline can streamline this process and ensure you receive the necessary support.
If you plan to travel frequently or develop a preference for a specific airline, booking directly with the airline can help you take advantage of loyalty programs and accrue benefits such as frequent flyer miles, priority boarding, and access to exclusive lounges.
So while third-party websites and apps are excellent at finding competitive prices and serve as convenient search options, it’s important to book directly with the airline for more peace of mind, direct support, and greater flexibility in managing your flights.
4. Know What Forms of ID Are Good to Fly With
A passport is required for international travel. In some cases, you will also need a travel visa to enter certain countries.
Starting from May 7, 2025, all air travelers who are 18 years of age or older will be required to have a REAL ID-compliant drivers’s license, a state-issued enhanced driver’s license, or another acceptable form of ID when flying within the United States.
It’s crucial that your identification documents, such as your passport or driver’s license, are not expired or nearing expiration.
This may be one of the most crucial first time flyer tips actually.
Some countries have a strict policy and may deny boarding if your passport expires within the next three to six months.
It is highly recommended to double-check the validity of your identification before booking your flight.
This way, you can avoid the inconvenience of being denied access to your flight at the boarding gate.

5. Know When to Book a Flight for First Time Flyers
The best time to book a flight is when you come across a good deal.
As mentioned earlier, the resources found within our top 9 ways to find cheap flights can be extremely helpful in being notified of such deals.
Once you receive a notification or spot a great flight deal, you should book it promptly. Prices can change rapidly.
By booking directly with the airline, you will have a 24-hour free cancellation policy on all flights.
This provides some flexibility in case you need to make changes or if you discover a better deal shortly after booking.
6. Know What Type of Flight to Book for First Time Flyers
Nowadays there are so many different flight tiers offered by different airlines.
It may actually be smarter to ditch the lowest basic economy option to opt for even more flexibility with your booking.
Upgrading your ticket can work wonders for your travel plans and wallet.
We’re not talking about anything extravagant – just a simple move from basic economy to the next tier up, which often goes by different names depending on the airline.
For the purposes of this article let’s just call this going from basic to main.
Think of it as a sweet spot that gives you more freedom while still being easy on your bank account.
Since the COVID-19 pandemic, many airlines have done away with change and cancellation fees on their main cabin tickets (at least one tier up from basic economy).
We love a good policy change!
By booking a main cabin ticket, you can still look out for better deals even after you’ve booked your flight without worrying about incurring change or cancellation fees.
Here’s the game plan:
- Purchase your main cabin ticket.
- Set up flight alerts for the same itinerary.
- Watch the ticket price, and if it drops, you have the power to cancel your original booking and snag the cheaper price.
- See the World, Save a Dollar!
Going from basic to main has really been a game-changer for us.
We are in the middle of planning a trip to the Bahamas. We booked our return ticket with Delta’s main cabin for $258 USD. And guess what happened?
This week, the ticket price dropped to $186 USD.
Since we booked main cabin (instead of basic), we were able to change our booking to the lower-priced option and received an e-credit for the price difference.
So, all that is to say, when you are on the lookout for cheap flights, remember that sometimes a little upgrade can go a long way.
Keep an eye out for those main cabin deals, enjoy the perks of flexibility, and don’t be afraid to snatch the better offer if it shows up!
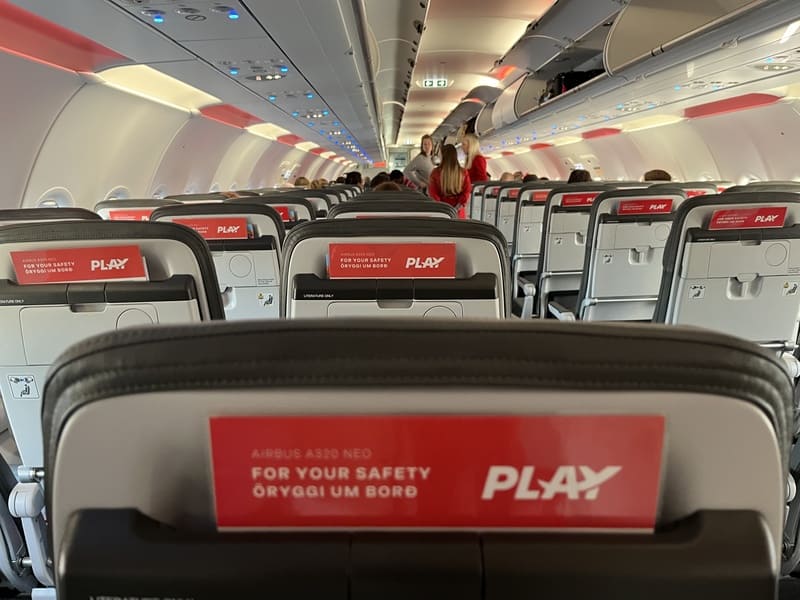
7. Understanding Airplane Seat Selection Process
Now you’re probably wondering, “How do I choose where to sit on a plane?”
The best seat on a plane can mean different things to different people and depends heavily on your travel style.
If you are looking for a luxury flight experience, your best bet is booking a first-class seat when purchasing your flight ticket.
If you are looking for extra legroom, the emergency exit row may have the best seat on the plane for you.
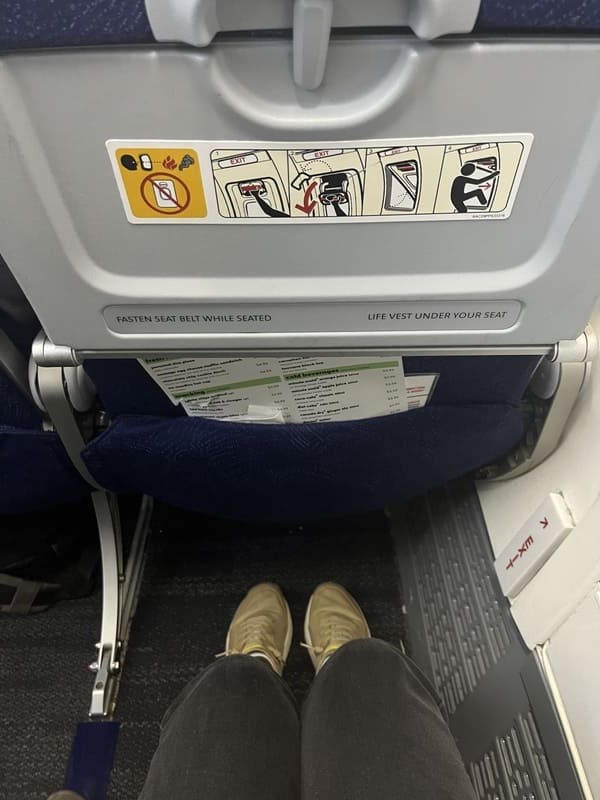
You’ll likely pay a higher ticket price by reserving a seat in the emergency exit row in advance compared to booking a standard seat ticket.
There’s a way around paying extra to sit in the emergency exit row, though.
If you arrive at the gate early, and ask if they are looking for any volunteers to sit in the emergency exit, they may offer you the seat for free if it is not a full flight.
The window seat may be best if you want to rest your head on the window to catch some zzz’s while you’re in the air.
The window seat positions you to have the least social interaction.
You can just admire the view from your window, have control over the window shade, have no one wake you up to get over you to go to the restroom.
I mean, the list can go on. But you get the point: the window seat is a fan favorite amongst introverts. (Or at least it’s my fave, I’m the introvert.)
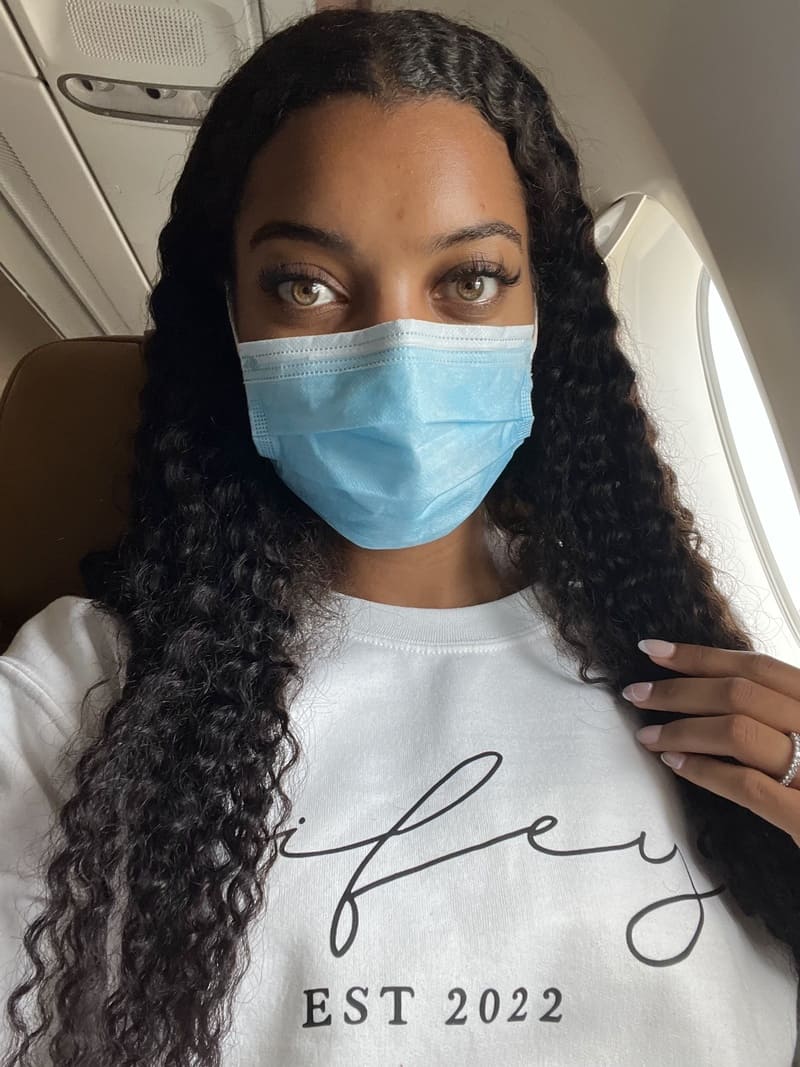
The middle seat is great if you are more of a social butterfly and like meeting other travelers.
The aisle seat has slightly more leg room (until the snack cart comes through the aisle). Also, it’s easier to get up and go to the restroom from the aisle seat.
The further back you sit on a plane, the bumpier the ride could be.
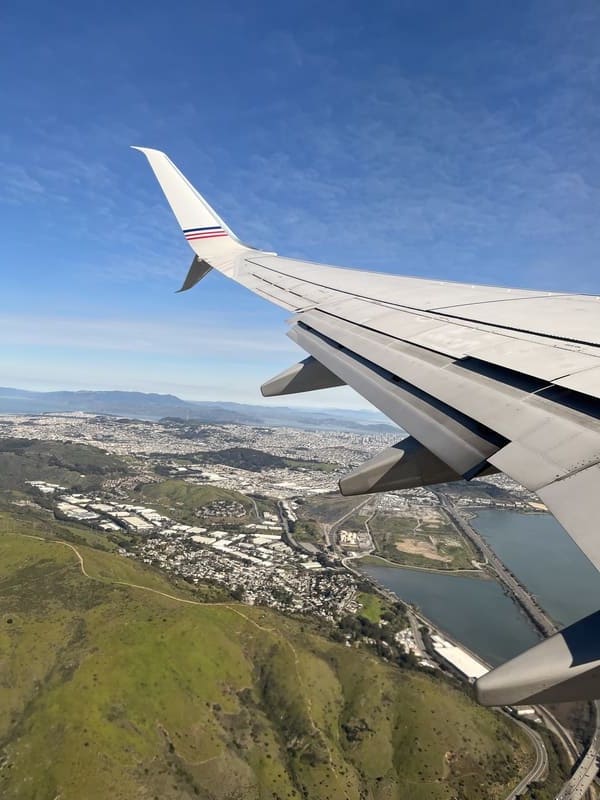
But if you sit by the wings of the plane, this is closer to the plane’s center of gravity so you could experience less turbulence.
When your airline emails you 24 hours in advance to remind you to check into your flight, be sure to make your seat selection (if you haven’t already) as soon as possible to try to reserve the best seat on the plane for you.
8. Review Your Airline’s Baggage Policy and Related Fees
Having a solid understanding of your airline’s baggage fee policy is one of the most important things you can do when purchasing your seemingly cheap flight ticket.
Otherwise, your bags could end up costing you more than your flight!
Depending on the type of ticket you purchase, you may or may not have to pay for checking your bags.
The lowest fare ticket will typically not include free checked bags, and sometimes does not even include a carry-on bag, depending on the airline you are flying.
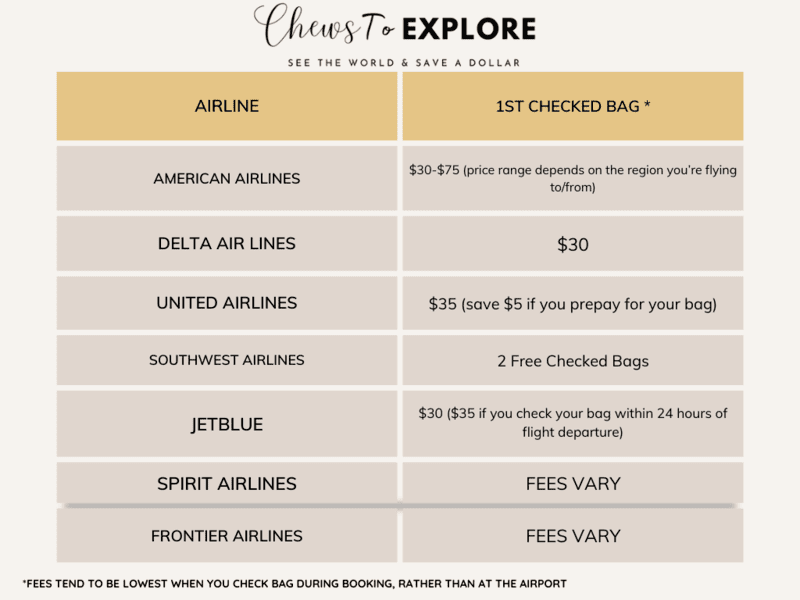
Knowing exactly how to avoid baggage fees is major and the first step to avoiding those fees is knowing what the airline baggage policies are.
Be sure to check your airline’s baggage policy on their official website so that you are aware of potential checked bag fees, overweight bag fees, and oversized bag fees. (Yes, there’s lots of fees to be aware of!)
We feature a few of the major US-based airlines and details on their baggage policies organized into charts and linked in our “10 Easy Ways to Avoid Airline Baggage Fees” article.
9. Understanding Carry-On Bag vs Checked Bag vs Personal Item
When you are flying, there are three options for the type of bag that you can bring: personal item, carry-on bag, and checked bag.
Each airline has slightly different definitions of each type of bag and associated fees.
I can’t stress enough that you need to be familiar with your airline’s baggage policy!
But I’ll give you an idea of the basic differences between the three types of bags that you can bring.
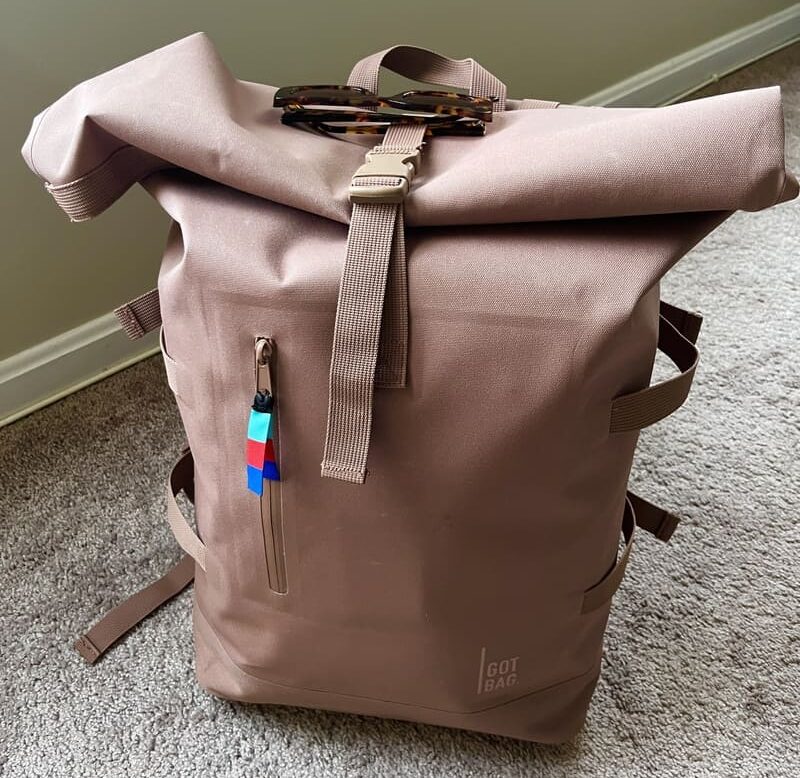
Personal Item
A personal item is small enough to fit under the seat that is in front of you on an airplane.
This could be a laptop bag, small purse, or even a backpack.
Carry-On Bag
By definition, a carry-on bag is a bag that can fit in the overhead bin on a plane.
Many US-based airlines allow you a free carry-on bag.
However, when dealing with budget airlines, there is usually a fee associated with your carry-on bag.
Checked Bag
A checked bag is a bag that flies underneath the plane in the cargo hold area.
Airlines will have different qualifications for weight limits on checked bags, and size dimension limits on checked bags.
These specific restrictions are all included in the airline baggage policies on your airline’s official website.
Once you know your airline’s baggage policy, you can make the best decision on the best travel bag for you to bring.
We highly recommend the GOT Bag which stands out as an incredible choice for those seeking sustainable and eco-friendly options that come in a variety of colors, styles, and sizes.
Finding your ideal GOT Bag is a quick and simple process. In under two minutes, you can discover your perfect GOT Bag here!
10. How to Pack More Without Paying More Baggage Fees
The Cosy Collection Neck and Bag Pillow is one of the most innovative investments any first-time flyer could buy.
It serves as an empty neck pillow that you can conveniently stuff with your clothes.
The best part is that it looks just like a regular neck pillow and does not count as a personal item or carry-on item when going through TSA (transportation security administration).
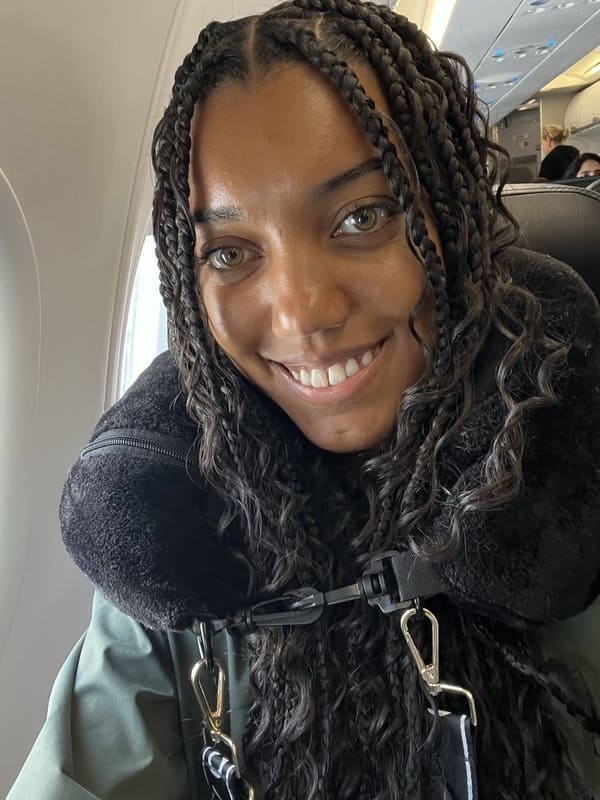
By utilizing the Cosy Collection Neck and Bag pillow you can discreetly pack more clothing while keeping your belongings organized and secure.
It allows you to optimize the space in your luggage without exceeding weight or size restrictions imposed by airlines.
This means you can avoid the hassle and cost of paying extra baggage fees.
Simply fill the Cosy Collection Neck and Bag Pillow with your clothes, zip it up, and use it as a comfortable neck pillow during your journey.
Not only does it save space, but it also provides you with added comfort and convenience while traveling.
🤩 Use code CHEWSTOEXPLORE for 10% off of your Cosy Collection Neck and Bag Pillow!
11. Buy Travelers Insurance
Travel insurance acts as a safety net, providing you with protection and peace of mind during your trip.
SafetyWing offers comprehensive coverage that includes medical expenses, emergency medical evacuation, trip interruption, baggage loss, and more.
Having travel insurance ensures that you are financially protected against unexpected events and emergencies that may arise during your travels.
12. Arrive Early to the Airport for Your Flight
The general rule of thumb is to arrive at your domestic flight two hours early and arrive at your international flight three hours early.
Basically, the earlier the better.
Certain airports will require you to come even earlier, such as the Queen Beatrix International Airport in Aruba.
We have an entire chapter dedicated to navigating this extremely busy airport in the “Explore Aruba Travel Guide.”
13. Wear A Comfortable Airport Outfit
Comfort is key when you’re traveling. Wearing a comfortable airport outfit is one of the things that makes travel easier.
Regardless of your final destination, airports and airplanes tend to have cooler temperatures.
You’ll want to prioritize wearing versatile clothes that can take you from the airport to vacation seamlessly.
You should also wear your bulkiest or heaviest items to the airport as this will greatly help with your mission to pack lighter.

14. Plan How You Are Getting to the Airport
As a first-time flyer, it’s essential to plan how you will get to the airport to ensure a smooth and stress-free start to your journey.
Take into account the distance between your location and the airport, as well as the time it typically takes to reach the airport during the specific day and time of your departure.
Be aware of traffic patterns and peak hours in your area. Give yourself plenty of time for your first time to the airport!
It’s better to arrive early and have some extra time than to rush and risk missing your flight.
15. Plan Foreign Money
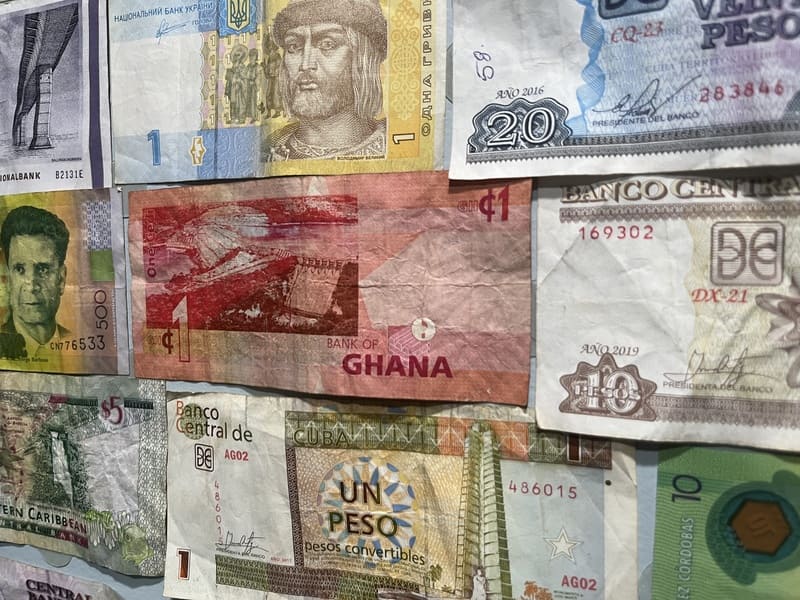
For first time flyers heading to a foreign destination, it’s crucial to plan your foreign currency needs. Here are some tips to consider:
Research Cash vs Credit
Research whether it’s more advantageous to use cash or credit cards in your destination.
Some countries primarily rely on cash transactions, while other widely accept credit cards.
Understanding the local payment practices can help you decide how much foreign currency to carry and when to use your credit card.
Avoid Foreign Transaction Fees
When using credit cards abroad, be aware of foreign transaction fees. These fees can significantly increase the cost of your purchases.
Consider obtaining a credit card that offers no foreign transaction fees to minimize additional expenses.
The same goes for when using ATMs abroad. Some banks charge withdrawal fees or impose a foreign ATM fee.
To minimize these costs, we use our Charles Schwab bank card that reimburses any ATM fees.
Exchange Money Wisely
If you decide to carry cash, it’s generally recommended to avoid exchanging a large amount of money at the airport.
Airport currency exchange services often have higher fees and less favorable exchange rates.
Instead, exchange just enough currency to cover immediate expenses upon arrival, such as transportation to your accommodation.
You can find better rates and lower fees at local banks and reputable currency exchange offices.
16. Bring an Empty Water Bottle
Airports are notorious for their high prices when it comes to food and drinks.
As a first time flyer, it’s important to be aware of this and make smart choices to save money during your journey.
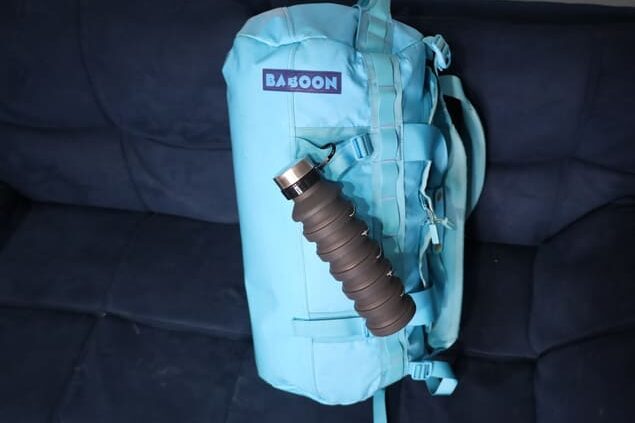
Staying hydrated is crucial, so I’d highly recommend you bring your own empty water bottle with you to the airport.
While a full water bottle cannot make it through TSA, an empty one is perfectly allowed.
To save space in your carry-on, consider using a collapsible water bottle.
It can easily be folded up when empty, taking up minimal space in your bag.
Once you have passed through the TSA checkpoint, you can expand the bottle and conveniently fill it up at a nearby water fountain before your flight.
17. Bring TSA Approved Snacks
Airport food is expensive for a variety of reasons, so most likely, you will never find cheap food to buy in the airport.
Now you may be wondering, “Can I bring food on a plane?” and I’m happy to tell you that yes, you can bring your own food on a plane!
Go ahead and pack your trail mix, protein bars, and even a cooked meal for your flight to avoid spending a fortune on food at the airport.
Keep in mind that your snacks need to be dry snacks since liquid snacks (hummus, salsa, salad dressings, spreads etc.) won’t pass through TSA if they are more than 3.4 ounces.

18. Bring a Portable Charger and Travel Adapters
On average, over 1 million people fly in the United States each day. This should give you a better perspective on how crowded airports can get.
You need to come prepared with your own portable charger so you won’t need to worry about overcrowded outlets at the airport. (But really, you don’t want to plug your electronics into any airport outlets anyway – more on that later!)
Keep in mind that if your portable charger has a lithium ion battery, then you will need to pack it away in your carry-on bag for your flight.
In most cases, TSA does not permit lithium-ion batteries to be packed in your checked luggage.
Also, if you are going to a foreign country, you will need a universal travel adapter to be able to plug in your devices since outlets may be different depending on the country you are traveling to.
The Minix 66 watt portable charger and the universal travel adapter from Amazon are great options.
19. Bring a Pen to Fill Out Important Travel Documents
Although many required travel forms are filled out electronically, there are many cases where you may still need to fill out a physical customs form, health screening form, or any other type of form in the airport.
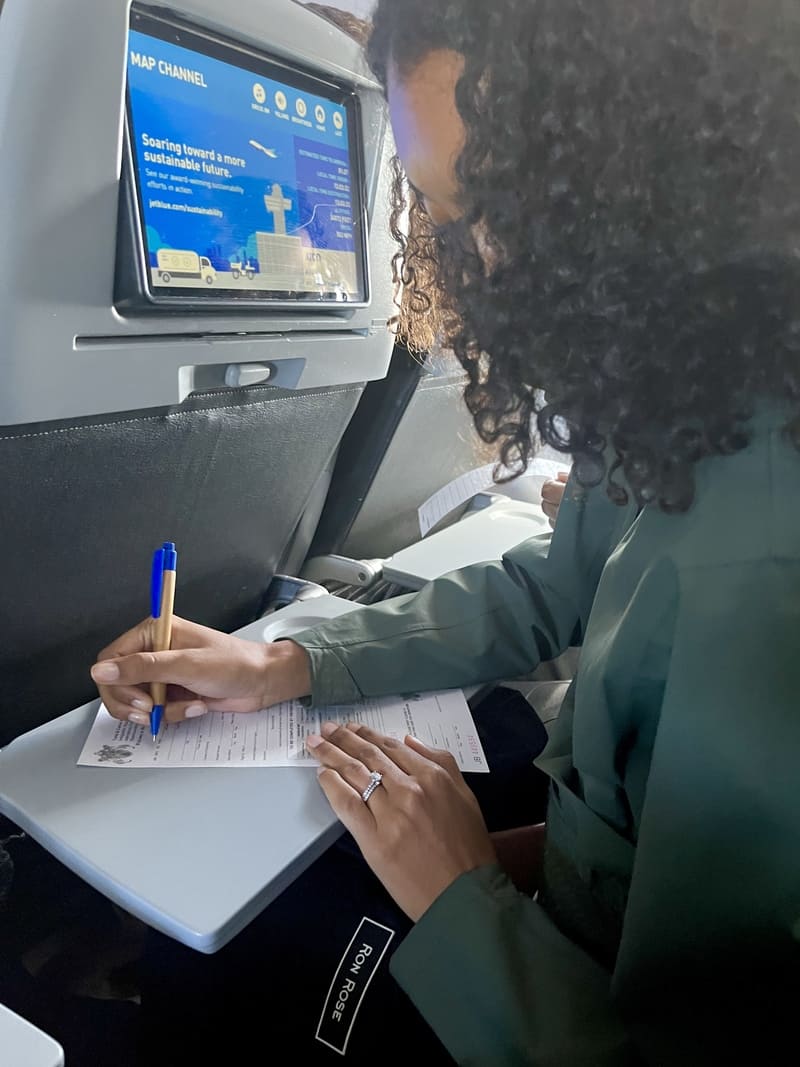
You may be wondering, “Can I carry a pen on an airplane?” The answer is yes, but you need to know which type of pen is allowed for air travel.
Tactical pens, which are designed as discreet weapons, are not permitted on airplanes.
These pens are specifically designed for self-defense and are prohibited by TSA regulations.
Fountain pens and rollerball pens have a higher likelihood of leaking or causing a mess during air travel due to changes in air pressure.
It’s advisable to avoid bringing these types of pens to prevent any potential ink leakages.
The best option for bringing a pen on your flight is a regular ballpoint pen.
These pens are typically reliable, easy to use, and less like to cause any issues during your journey.
20. Plan What Travel Essentials to Pack
When you are preparing to pack for your travels, you will need to know what to pack, and this will vary depending on the type of bag you are packing.
For the best tips on what travel essentials to pack, check out our complete guide on how to pack like a minimalist.
If you’re bringing checked baggage, it is a good idea to pack at least two to three days of clothing (including underwear) in your carry-on bag.
The last thing you need is for your checked bag to get lost, and then you end up with nothing to wear on your vacation right away.
If you happen to bring anything valuable on your trip, keep it in your carry-on bag, rather than packing it in your checked bag which can be subject to theft.
Also, when bringing a checked bag, be sure to weigh your bags before heading to the airport.
This will help prevent you from overpacking and falling victim to an overweight baggage fee at the airport!
21. How to Keep Track of Your Checked Bags
Tie a bright-colored ribbon around your checked bag so when you get to the baggage carousel, you can easily identify your bag.
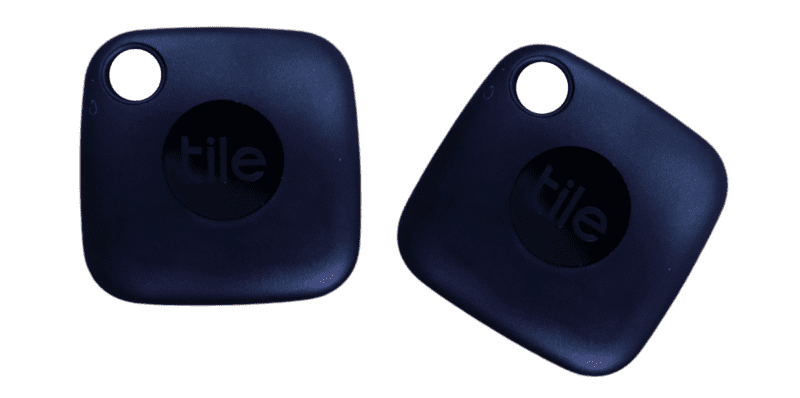
And if you’re a little more tech-savvy, go ahead and use a TILE to keep track of your checked bag’s location.
The TILE is connected to the TILE app. When opening the TILE app, the grey circle will turn into a green circle on your TILE app which signifies that your bag is near.
It also doesn’t hurt to take a picture of your checked bag in case it gets lost which will increase your chances of finding it when you reach out for help at the baggage claim office.
22. Download Your Airline’s Mobile App
You can check your flight’s itinerary and flight status on the airline’s mobile app.
It will notify you of any delays and gate changes so you can act quickly to resolve any issues getting to your destination.
Some airline apps have other helpful features such as interactive airport maps which assists you in navigating through the terminals.
Do yourself a favor and download your airline’s mobile app because you never know when you may need it!
23. First Time Flying How to Check In
How early can you check in for a flight? This can vary from airline to airline, but typically anywhere between one hour to 24 hours prior to the time of flight departure.
This is pretty easy to figure out if you already downloaded your airline’s mobile app.
You can check into your flight in advance on the airline’s app, but you can also do this on the airline’s website.
When you first purchase your flight ticket, you may be able to select your seat assignment way in advance, depending on which tiered ticket you buy.
However, not all airlines allow you to pre-select your seat, such as Southwest Airlines which allows you to sit anywhere that is available once you board the plane.
By checking into your flight ahead of time online, you will save time in the airport and can give you an opportunity to select the best seat on the plane for you.
Take the time to familiarize yourself with your airline’s check-in policies.
Some airlines may require in-person check-in at the airport and do not offer online check-in.
Additionally, certain airlines may charge a fee if you wait until you reach the airport to check-in.
If you plan to check in at the airport, look for your airline upon arrival.
Self-check-in kiosks are often available, where you can follow the on-screen instructions to check in and print your boarding pass.
Alternatively, you may need to approach one of the airline’s agents at the front desk to assist with the check-in process, especially if you have bags to check.
Regardless of how or when you check-in for your flight, after you check in, you will receive a boarding pass, either in print or digital format.
This document confirms your seat assignment and provides important flight information.
If you encounter any issues or have questions during the check-in process, feel free to approach the check-in desk or gate agents for assistance.
24. Keep a Copy of Your Boarding Pass Handy
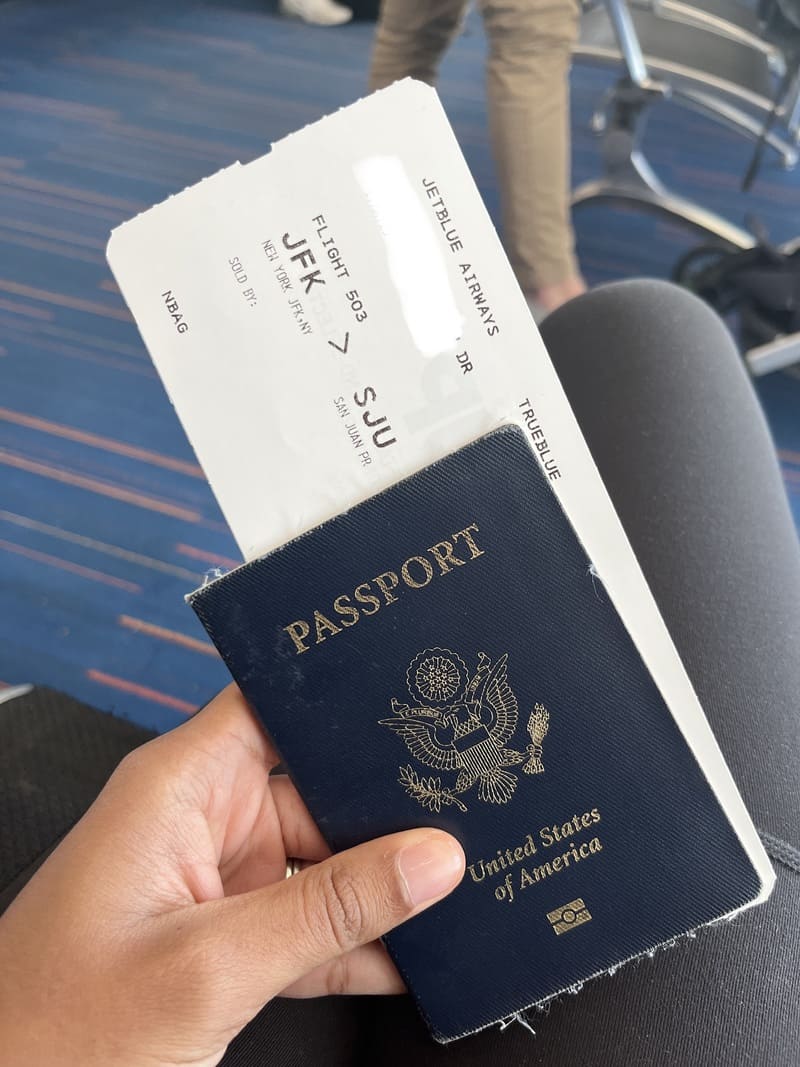
Your boarding pass is your “golden ticket” to your flight’s destination. This is the document you received when you checked into your flight.
Whether you have a physical copy or a digital copy of your boarding pass, you will need to keep it handy for your entire journey through the airport.
Before going through TSA they will check that you have a boarding pass (along with your passport if traveling internationally).
25. What to Do After Checking In
After completing the check-in process, the next thing you’ll need to do is proceed to security.
Follow the signs directing you towards the security area. These signs are typically located throughout the airport and will guide you to the appropriate security checkpoint.
26. Who to Ask for Help at the Airport
As a first time flyer, navigating through a busy airport can sometimes be overwhelming, especially if you encounter confusing signs or have questions.
Airport staff members are readily available to provide airport assistance for first time flyers.
Look for airport personnel wearing uniforms or identification badges.
They can be found at information desks, customer service counters, or stationed throughout the airport.
Approach them with your questions or concerns and they will be happy to assist you.
Remember, seeking assistance is perfectly normal and expected, especially for first time flyers.
27. TSA Tips for First Time Flyers
Prepare to go through airport security by making sure you have a clear understanding of what not to bring in airport.
If you are like us, and are avoiding the checked bag route, you’re going to need to know what you can and cannot pack in a carry-on bag.
Check the helpful images below!
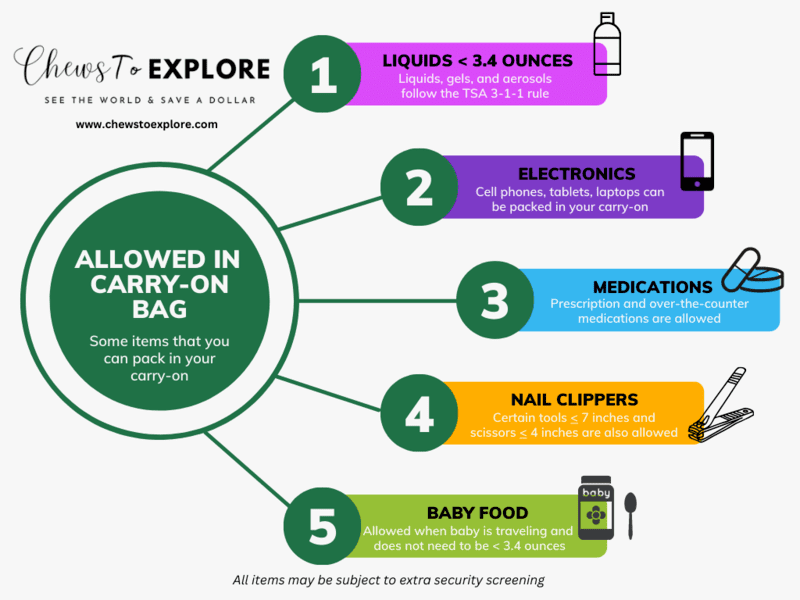
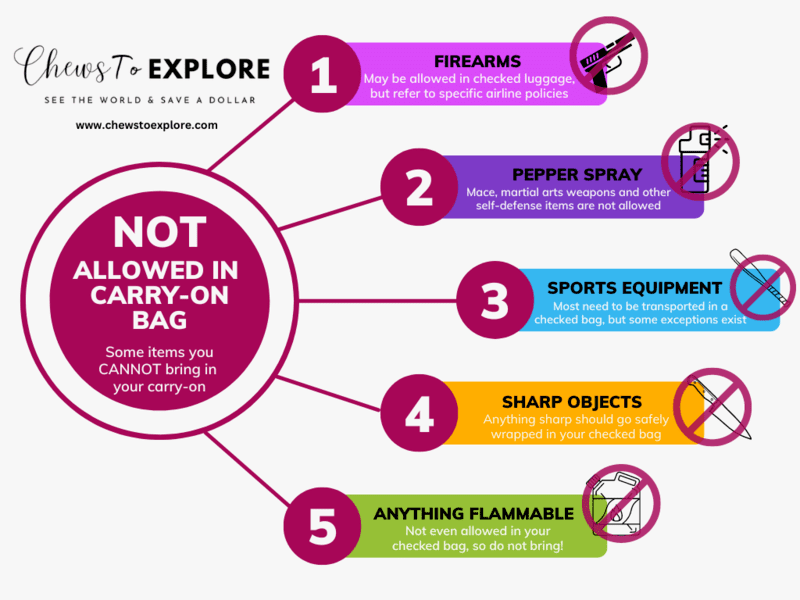
If you scrolled past the last two images, scroll back up, zoom in, and maybe even download the diagrams for future reference.
This is not an all-encompassing representation of what you can and cannot bring in your carry-on bag, but a good starter reference.
Be sure to check your specific airline policies and TSA guidelines linked here for more details!
RELATED ARTICLE: What to Pack on a Trip: Essential Items Every Traveler Should Own
28. Know the TSA Liquid Rules
TSA follows the 3-1-1 rule for carrying liquids in your carry-on bag. This means that each liquid item must be in a container that holds a maximum of 3.4 ounces (100 mL).
All your liquid containers must fit into a single quart-sized, clear plastic bag.
Perfect-sized travel containers for your carry-on >> Cadence Capsule Travel Containers
29. Review TSA’s List of Restricted Items
When preparing for your journey, it’s important to know the TSA restrictions.
If you have questions about whether a specific item can be packed or not, you can conveniently text TSA directly for answers.
Simply text “TRAVEL” to 275-872 (ASK-TSA), select your question’s category, and ask for the information you need!
You will receive an automated response, and if your question is complex, a human agent will provide further assistance.
30. Keep Your Identification & Travel Documents Handy
There are many checkpoints in the airport that require you to present your passport or other acceptable forms of ID for flying.
Depending on your destination, you may also need to present a travel visa, COVID-19 vaccination card, and COVID-19 test results.
Keep any required travel documents close within your reach so you won’t be the rookie traveler fumbling looking last minute and holding up lines.
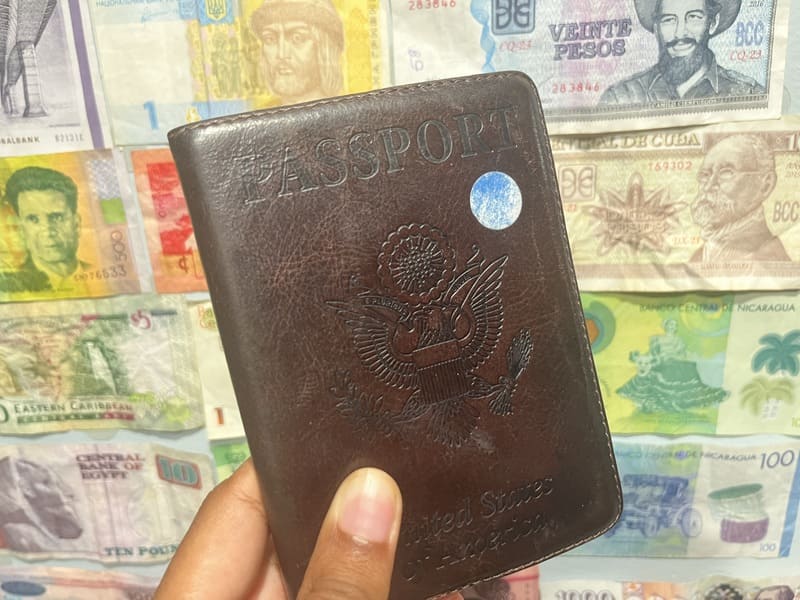
Once you get to your international destination, you will need to always keep your passport on your person.
You can easily do that using this anti-theft day bag that comes with a customizable lock and is comfortable to wear.
Your passport may be required to check into hotels or hostels, exchange currency, and purchase a sim card for your phone (if you haven’t already purchased your e-Sim from AIRALO), so you should expect to have it ready!
31. Empty Your Water Bottle Before Going Through TSA
Drink the remaining water from your bottle before discarding it. If you brought your own refillable water bottle, luck for you!
You can refill it later, saving money and reducing waste.
32. Prepare to Remove Your Shoes
In some airports, you may be required to remove your shoes during the security screening process.
So it’s a good idea to wear socks to the airport!
However, this may not be the case at every airport and may vary depending on factors such as your age.
33. Know What Jewelry to Remove for TSA
Generally, larger jewelry items may need to be removed for security screening. This includes items such as large necklaces, bracelets, or bulky accessories.
Smaller jewelry like earrings or rings can typically be left on.
34. Remove Large Electronics From Your Bag
Large electronic devices, such as laptops, may need to be removed from your bag and placed in a separate bin for screening.
Listen to the instructions provided by the TSA agent for specific guidance on electronic items.
35. Remove Your Belt
To avoid setting off the metal detector unnecessarily, remove your belt and place it in a bin along with your other personal items.
This helps ensure a smoother screening process.
36. Remove Jackets and Hoodies
Ideally, remove outer layers such as jackets or hoodies and place them in a bin for screening.
This allows for a clearer image on the scanner and can expedite the process.
37. Remove Your Phone
You can either keep your phone inside your bag that goes through the scanner or place it in one of the bins.
38. Make Sure Your Pockets are Empty
Before stepping through the scanner, ensure that your pockets are empty.
Remove any items and place them in a bin or dispose of them appropriately.
39. What to Do at the Scanner
Wait until instructed by the security personnel on when to enter the scanner.
Different kinds of scanners exist.
Typically, there will be an image of a person with their arms up, indicating the position you should assume during the scan.
Alternatively, there may be a scanner that you simply walk through.
Follow the instructions provided by the TSA agent.
40. Prepare for Pat Downs
In some cases, you may be subject to an additional pat-down after going through the scanner.
If you feel uncomfortable, you have the right to request a private screening area.
41. What to Do If Your Bag is Flagged
If your bag is flagged during the screening process, security personnel may need to open it and conduct a thorough inspection.
They may remove items that are not permitted, such as large containers of liquids or gels.
After the inspection, your bag will be repacked, and you’ll be good to go.
42. Pay Attention to Security
This is one of the most important airport tips.
The TSA agents will ultimately tell you everything you need to know while you are in line.
They will tell you where to wait, how long to wait, when to walk through the scanner, if you need to be pat down, etc.
Different airports may have different security policies, but there will be signs by the security bins to let you know what needs to be done, so keep an eye out to follow directions smoothly.
If you have any questions, feel free to ask for help.
43. Consider a Trusted Traveler Program: TSA Precheck vs Global Entry vs CLEAR
Most airlines recommend you get to the airport at least 2-3 hours before your flight’s departure, but there are ways to speed up the time you spend going through security to cut that recommended time in half.
This is one of the most game-changing airport tips out there!

One way to make your time in the airport easier as a first time flyer and speed through security is by joining a trusted traveler program such as Global Entry, TSA Precheck, and/or CLEAR.
Be mindful that each of these programs may not be in every single airport, which is why some travelers have more than one membership.
Look at what trusted traveler programs are offered at your main airport(s) to decide what is best for you to join.
Below you will find some key differences between these three programs.
TSA PreCheck
TSA PreCheck is a shorter security line in the airport that will help you save time when departing from the United States at select airports. You won’t have to remove your belt, coat, shoes, or large electronics. This expedited screening will save you lots of time in the airport.
It costs $78 for 5 years of TSA Precheck which you can apply for using this link. Once you are approved for TSA PreCheck, you will receive a Known Traveler Number (KTN) which should be input whenever you book a flight to ensure that “TSA PreCheck” appears on your boarding pass to expedite your security screening.
Global Entry
For an additional $22 you can have Global Entry which also includes TSA PreCheck for a total of $100 for 5 years. This is a non-refundable fee that is due at the time of applying for Global Entry which you can do through this link. Make sure you are eligible before applying!
After you are conditionally approved for Global Entry, you will need to undergo an interview at a Global Entry Enrollment Center. There tends to be limited availability for scheduling these interviews, but there is one way to get your Global Entry interview sooner.
When you return to the US from an international flight, you can let the customs agent know that you have been conditionally approved for Global Entry and ask if their Global Entry office is currently open to complete your interview.
I would recommend getting Global Entry rather than just TSA PreCheck (particularly if you travel internationally frequently) because Global Entry will fast track you through US customs when you return to the US from an international trip at select airports.
You skip all the lines, and go to an automatic kiosk where you will scan your passport, scan your fingerprint, and complete a simple customs declaration before going about the rest of your day.
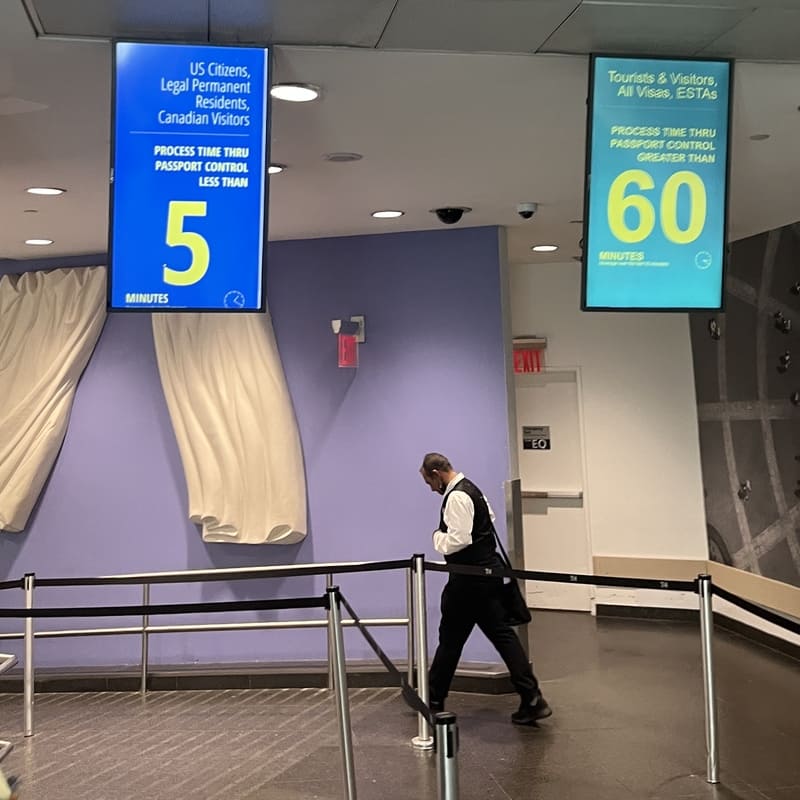
Certain credit cards such as the Chase Sapphire Reserve, Capital One Venture, Capital One Venture X, AMEX Platinum, Marriott Bonvoy by AMEX have perks that give you reimbursement for a free TSA PreCheck or Global Entry membership.
If you’re interested in learning more about finding the best-fit travel credit card for you and how to get maximal benefit for budget travel, join our weekly budget travel newsletter for the latest tips!
CLEAR
TSA PreCheck and Global Entry are both owned by the government, unlike CLEAR which is a private company. CLEAR allows you to skip the line altogether and uses biometric face scans to identify you at the security checkpoint.
You will still need to remove your shoes, belts, coat, and large electronics with CLEAR. This is why some travelers might combine their CLEAR membership with either TSA PreCheck or Global Entry to expedite the process even further.
CLEAR costs $189 for one year, and you can add up to three family members for an additional $65 per person. Certain credit cards such as the AMEX Green card offers reimbursement for free CLEAR membership. The AMEX Green card has a $150 annual fee so the card pays for itself really if you are interested in getting CLEAR.
CLEAR is also offering a free 2 month trial to test it out when you sign up through this link.
44. Take Advantage of Duty-Free
When traveling through airports, you have the opportunity to take advantage of duty-free shopping.
Duty-free refers to the concept of purchasing goods without paying certain taxes. These taxes are waived or reduced for items purchased in designated duty-free shops at the airport.

45. Understanding Your Boarding Pass
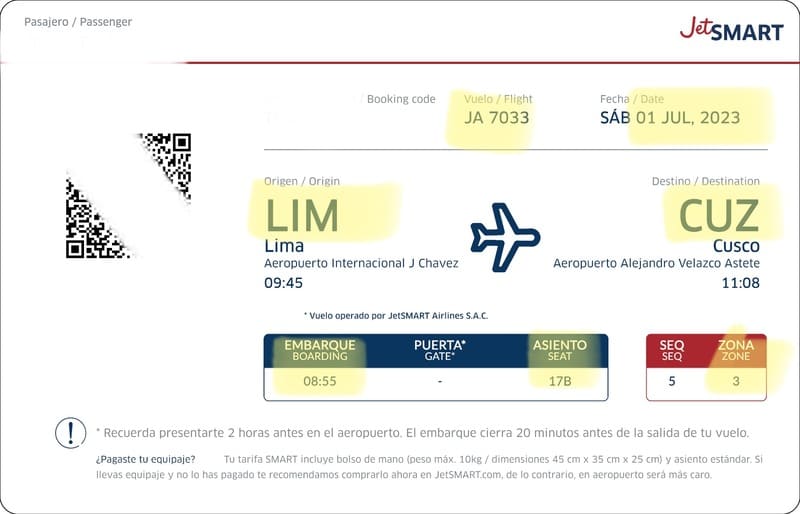
Your boarding pass is a crucial document that provides essential information for your flight.
It will display your flight number, the airline’s name or code, and the date of your flight.
This information ensures that you are boarding the correct flight on the fight day.
The boarding pass specifies the airports for your departure and arrival.
It also includes the gate number. This indicates the specific location within the airport where you need to go to board your flight.
Pay close attention to the gate number, as it may change, especially if there are flight delays.
Check the airport monitors for any updates or listen for announcements.
Your boarding pass will provide the boarding time for your flight.
This is the time when the airline starts the process of allowing passengers to board the aircraft.
It’s important to arrive at the gate well in advance of the boarding time to ensure a smooth boarding process.
Many airlines use a boarding system based on zones or group numbers.
Your boarding pass will indicate the assigned zone or group number that determines when you will be called to board the flight.
It will also specify your seat number and many times will have a scannable QR code or barcode for airport personnel.
46. How to Read Airport Signs
When navigating through airports, understanding the signage is essential for finding your way to the right gate.
Pay close attention to the gate and airline signs displayed throughout the airport.
These signs will typically have the airline’s logo or name along with the gate numbers associated with each airline.
Many airports have multiple terminals or concourses, each with its own set of gates.
Look for signs indicating the different terminals or concourses, and follow the signs that correspond to your airline.
Keep an eye out for large digital screens, usually located near the gates or in central areas of the airport.
These screens display important flight information, including the airline, flight number, departure time, gate number, and status updates such as “boarding,” “on time,” “delayed,” or (hopefully not) “canceled.”
Check these screens regularly to stay informed about any changes to your flight.
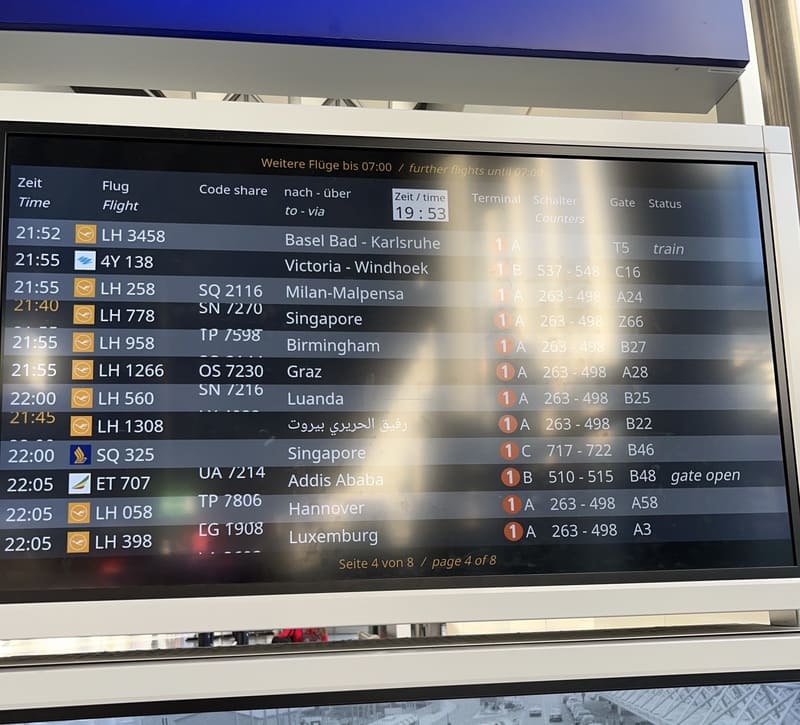
Look for large numbers displayed in front of the airline gates. These numbers indicate the gate assigned to a specific flight.
The “gates” typically consist of seating areas in front of the door leading to the walkway that connects to the airplane.
Airports use various directional signs and symbols to guide passengers.
Look for signs indicating specific locations, such as baggage claim, security checkpoints, restrooms, or information desks.
These signs often use internationally recognized symbols to provide clear guidance regardless of language barriers.
47. Sit At a Nearby Gate
More than likely, your gate is going to be packed with travelers, like yourself.
To gain some social distance, sit at a nearby gate (where there are fewer people) instead of the gate that you are assigned to.
Choose a seat close enough to your assigned gate so that you can still keep an eye on what’s happening.
This way, you can easily observe any boarding announcements or updates related to your flight.
48. Consider Lounge Access
Airport lounges give you a taste of the good life. There’s free food, free drinks, and exclusive seating.

The restrooms in the lounges are particularly clean and sometimes even have showers.
If you have lounge access (whether that be through a credit card perk or a first-class flight ticket), you will want to arrive at the airport early enough to enjoy this bit of luxury before your flight.
Just be mindful that some lounges may limit the duration of your time in the lounge (ie. 2 hours max stay).
49. Set an Alarm for Boarding Time
This is major advice for first-time flyers!
Sometimes, if you’re taking a nap at the gate or having too good of a time in the lounge, you might miss your flight.
It happens to the best of us (like my husband). What was supposed to be 5 days in Guatemala, turned into the 4 days = $392 vlog.
He still had an amazing bro’s trip, but it was one less day than originally planned.
To avoid missing out on precious vacation time, set an alarm for boarding time!!!
I’m saying it louder for the people having their third margarita in the lounge.

It’s super important to set an alarm to let you know it is time to get back to your gate before the gates close on you.
When it comes to air travel, there are different time points to consider.
There is a boarding time, a gate close time, and a departure time for your flight.
You must be at your gate before the gates close which is usually around 15 to 20 minutes before the scheduled departure time.
50. Beware of “Juice Jacking”
One of the key tips for first-time flyers is to be cautious about charging your electronic devices at public USB ports.
When it comes to charging your devices, not all outlets are created equal. Some public USB charging stations, like those found in airports, may be compromised.
Cybercriminals can exploit these charging stations by loading malware onto them, which can then infect your device when you connect it to the charging port.
To minimize the risk of falling victim to juice jacking, you should rely on your own portable charger.
Portable chargers allow you to charge your devices directly from their built-in battery, eliminating the need to connect to public ports.
51. Download Your Own Entertainment
It’s essential to come prepared with your own entertainment options, especially if the airline you’re flying with doesn’t offer WiFi or onboard entertainment.
You can download your favorite movies or TV series beforehand on streaming platforms like Netflix or HBO Max.
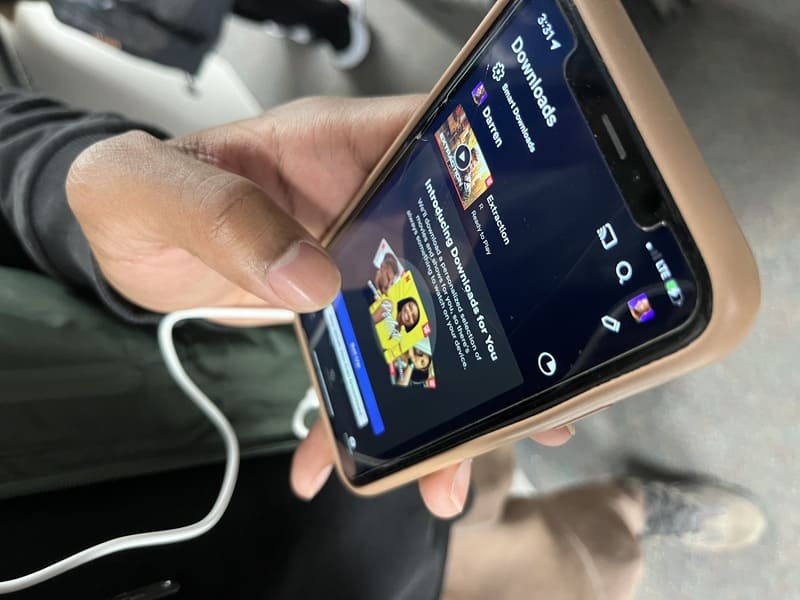
This way, you’ll have access to enjoyable content even without an internet connection.
Before boarding my flights, I make sure to download all my favorite Jhené Aiko and Beyoncé songs from Apple Music.
You can also bring a good book to keep you entertained on the flight. I have some of my favorite books linked HERE.
52. Fill Up Your Water Bottle
As you prepare to board your flight, don’t forget to fill up your reusable water bottle.
Instead of spending a fortune on purchasing water bottles at the airport, make a smart choice to stay hydrated by refilling your own at a nearby water fountain.
53. What to Do If Your Flight is Full and You Need to Gate Check Your Bag
This happens sometimes. If the flight is full, they may ask you to check your carry on bag for free.
Just make sure you have what you need for your flight with you or in your personal item that will be easy to access during your flight.
54. How to Board Your Flight
When it’s time to board your flight, your boarding pass is your key.
Keep it readily accessible and refer to it throughout the boarding process.
It contains important information about your seat assignment, boarding group or zone, and other relevant details.
Pay attention to the announcements made by the flight attendants.
They will inform you about the boarding order, starting with specific groups or zones.
Typically, families traveling with small children or passengers needing special assistance will be called first, followed by other designated groups.
Look for your boarding group or zone information on your boarding pass.
It may be indicated by a number or a letter. This will determine when it’s your turn to board the aircraft.
If you have your boarding pass printed out, make sure there are no rips or tears to ensure that it is scannable.
If you have a mobile boarding pass, make sure the brightness is turned all the way up on your screen to make sure there are no issues with scanning the barcode.
Once your boarding pass is scanned, listen to the directions given by the gate agents.
They will guide you to the correct boarding area, whether it’s through a hallway leading to the plane’s entry door, up stairs or ramps leading to the plane’s entrance, or onto a shuttle bus that will transport you to the aircraft.
Pay attention to their instructions and follow the designated path. Make your way to the front of the plane, as instructed.
55. How to Find Your Seat on Your First Time on a Plane
Again, your boarding pass is your best friend. Your boarding pass includes a number and letter combination that lets you know where you are sitting.
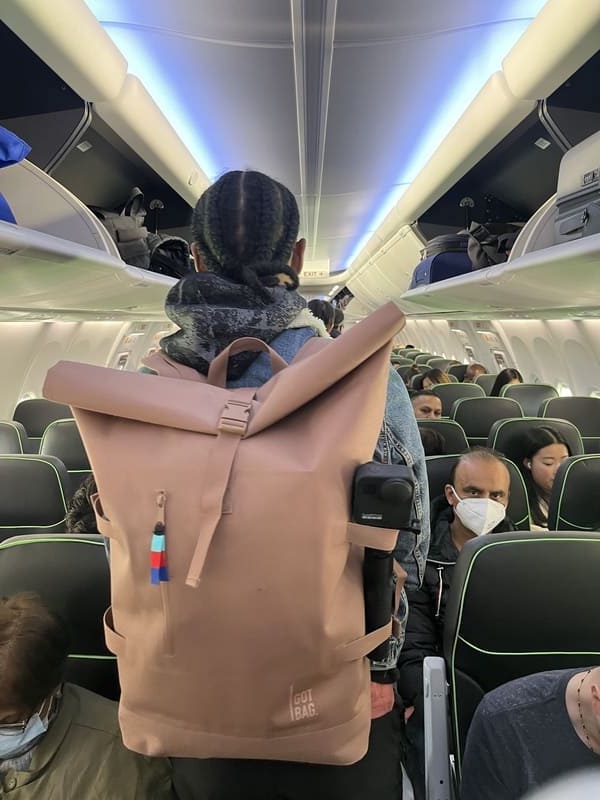
The number represents the aisle number you are in, and the letter tells you whether you have a window, aisle, or middle seat.
As soon as you step foot on the plane, you will be greeted by flight attendants who will be happy to answer any questions you may have regarding finding your seat.
There are also flight attendants throughout the plane that are standing in their uniforms and ready to help you find your seat if you need assistance.
56. Where to Put Your Bags
If you have a tiny personal item that can fit under the seat, place it all the way underneath the seat in front of you.
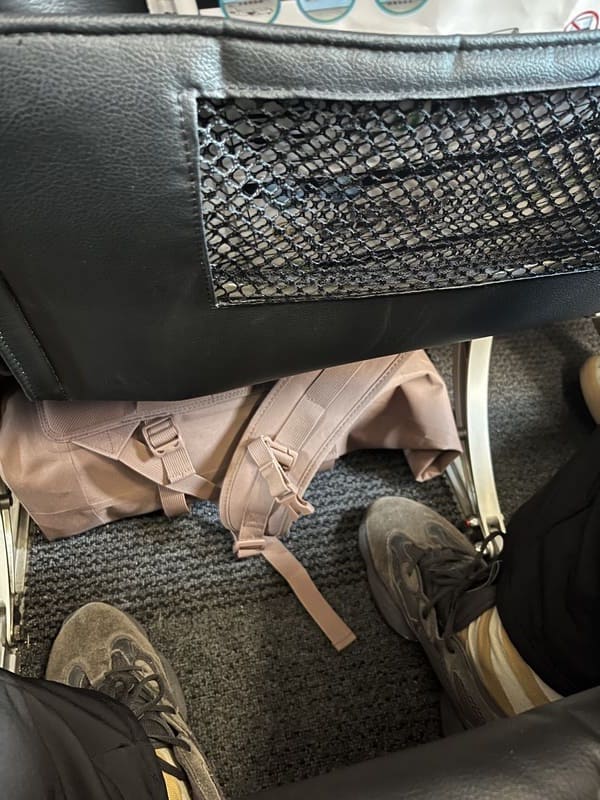
If you have a carry-on bag, put it in the overhead bins above your seat.
If the overhead bin is already closed by the time you board the plane, it’s likely that it is already full, so as you board, look ahead to see if the bins by your seat are closed.
If so, look for an overhead bin before you reach your seat to put your carry-on bag in.
If you face any challenges, ask for assistance from a flight attendant.
57. Disinfect Your Space on a Plane
When it comes to flying, it’s important to take precautions to protect your personal space, especially in situations where fellow travelers might be sick.
Once you reach your seat, use antimicrobial wipes to clean the armrests, tray tables, and any other surfaces you may come into contact with.
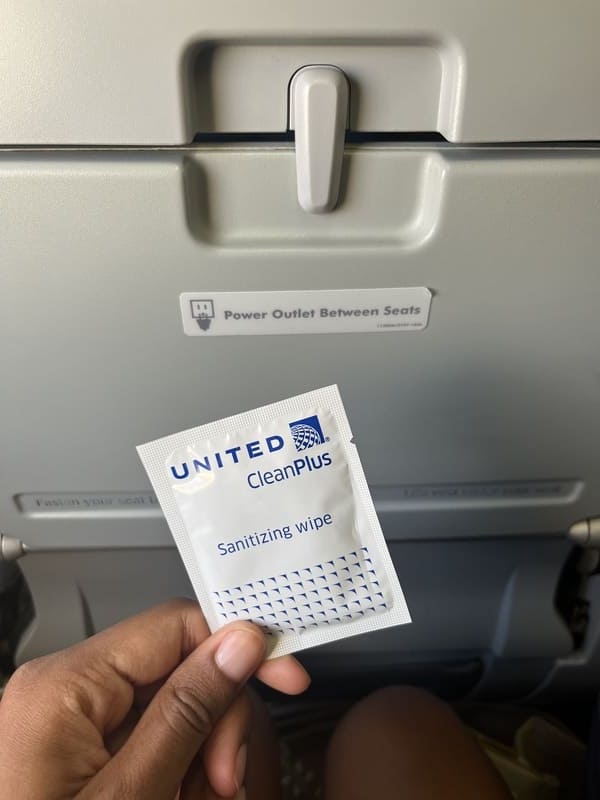
This simple step can help eliminate germs and provide a cleaner space for your journey. Consider packing travel-sized packs of disinfecting wipes in your carry-on for easy access.
Also, before consuming any food or touching your face, use hand sanitizer to keep your hands clean.
Just make sure the hand sanitizer is less than 3.4 ounces.
58. Set Your Phone to Airplane Mode
Before takeoff, it’s important to switch your phone to airplane mode.
Airline regulations require this to avoid interference with the aircraft’s navigation and communication systems.
You can still access and enjoy any content you downloaded to your device beforehand while it’s on airplane mode.
59. Pay Attention to Airplane Emergency Measures
After you get settled onto your flight, the flight attendants will demonstrate safety instructions or a safety video will play if there are on-flight screens.
Here are a few key points to remember:
Stow Your Items
You will need to keep all items stowed either in the overhead bins or underneath the seat in front of you.
Keeping the aisles and exits clear helps facilitate a safe and efficient evacuation process if necessary.
Fasten Your Seat Belts
You will need to keep your seat belt fastened as a safety precaution in case of unexpected turbulence.
Electronics and Devices
Until reaching a certain altitude, as announced by the crew, it’s important to have all electronics unplugged from the outlets until you reach a certain altitude.
60. What To Do If You Have Flight Anxiety
Flight anxiety is common and everyone’s experience is unique. It’s important to find coping mechanisms that work best for you.
The following is not medical advice, just what I’ve found to help me with flight anxiety.
Whenever I’m experiencing anxiety on a flight, I practice deep breathing exercises and play my favorite music to distract me from the sounds of the engine and create a calmer atmosphere for myself.
I also like looking out the window to see whether there are a lot of clouds to anticipate any turbulence.
I like to know when it’s coming because turbulence can be anxiety-inducing, especially when it’s unexpected. But I understand that turbulence isn’t dangerous.
By trying different techniques and seeking support when needed, you can make your journey more comfortable and enjoyable.
61. What to Do When Your Ears Pop On the Plane
As your plane changes altitude, it can cause discomfort or a sensation of pressure in your ears.
You can chew gum or yawn intentionally to equalize the pressure and stop this sensation.
62. Enjoy Your Flight!
I know there are a lot of gems in this article, but one of the most important airplane travel tips is to enjoy your flight!
Make sure your book, earphones, or other form of entertainment is within reach so you won’t have to get up and search for them after you need them.
Get cozy on your flight with your luxurious Cosy Collection NAB pillow that saved you some extra baggage fees, and enjoy your flight!
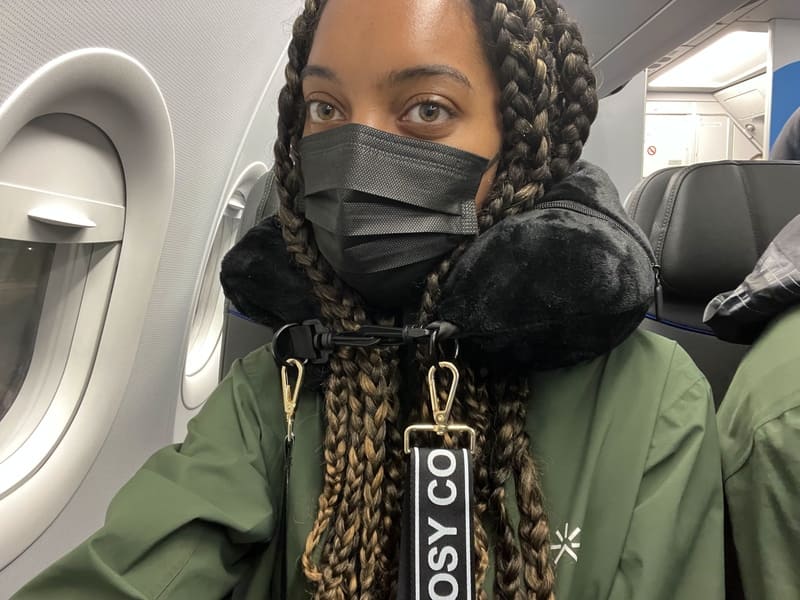
Be mindful of the volume of your earphones. If they are plugged into the in-flight screen, it will pause for important announcements.
But if you are just connected to your own electronic device using Airpods, you will want to keep the volumes at a moderate level to avoid missing important flight announcements.
63. What to Do When Your Flight Lands
About 30 minutes before landing starts, the pilot will likely make an announcement that they will begin making their initial descent.
This just means they are going to start flying at lower heights. You may feel some dips, but you’re prepared for them.
As the plane gets closer to the ground, the wheels will extend from the bottom of the plane in preparation for landing.
Once the plane reaches the ground, it will be rolling on its wheels pretty fast until it slows down.
Keep your seat belt on until the seat belt light is off. Gather whatever you have in your seat. When the seat belt light turns off, you can begin to get up and grab your bags off the plane.
Take a moment to ensure you have all your belongings.
Check for any smaller items you may have placed in the seat pocket in your seat.
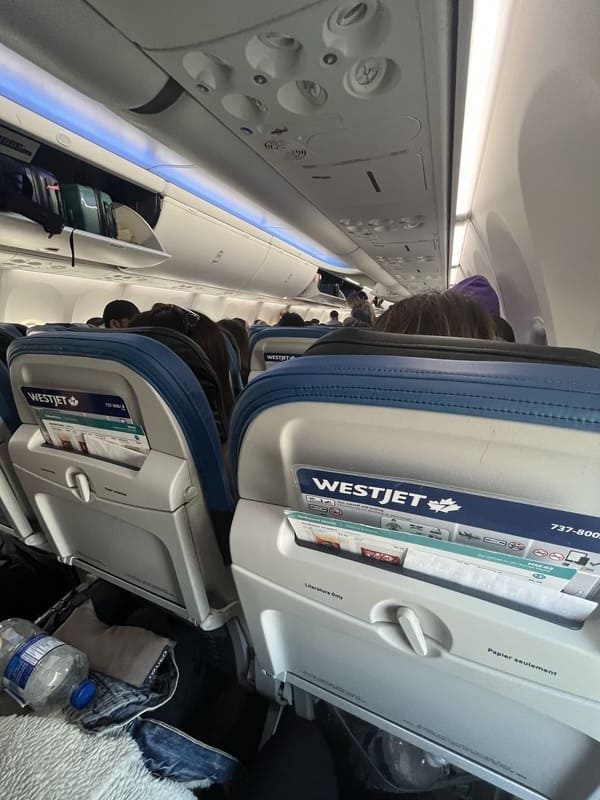
Make sure you have your glasses, earphones, phone, wallet, etc. because once you leave the plane you cannot re-enter the plane.
If you are seated near the back of the plane, there’s usually no need to stand up too soon to exit unless you have a specific reason, like wanting to stretch your legs in the aisle.
It’s often more convenient to wait until there is movement and it becomes apparent that other passengers are actually exiting the plane.
In some cases, if you’re running late for a connecting flight, especially if it’s with a different airline, you may want to stand up and try to exit the plane sooner.
Be mindful that sometimes the plane will come to a stop before reaching the gate or before the gate doors open.
In these instances, it’s best to exercise patience and wait for the appropriate time to exit the plane.
Read the room and observe the behavior of other passengers for helpful cues, especially if it’s your first time on a plane.
64. Follow the Exit Signs
Once you step off the plane, your next step is to follow the exit signs.
These signs will guide you toward the baggage claim area or customs, depending on your destination and travel requirements.
If you find yourself in a foreign country and are unsure about the language, you can use the Google Translate app to assist you.
Simply open the app and take a picture of the signs you come across.
The app will translate the text for you, helping you understand the directions.
Just make sure you’re in an area that phone use is allowed first.
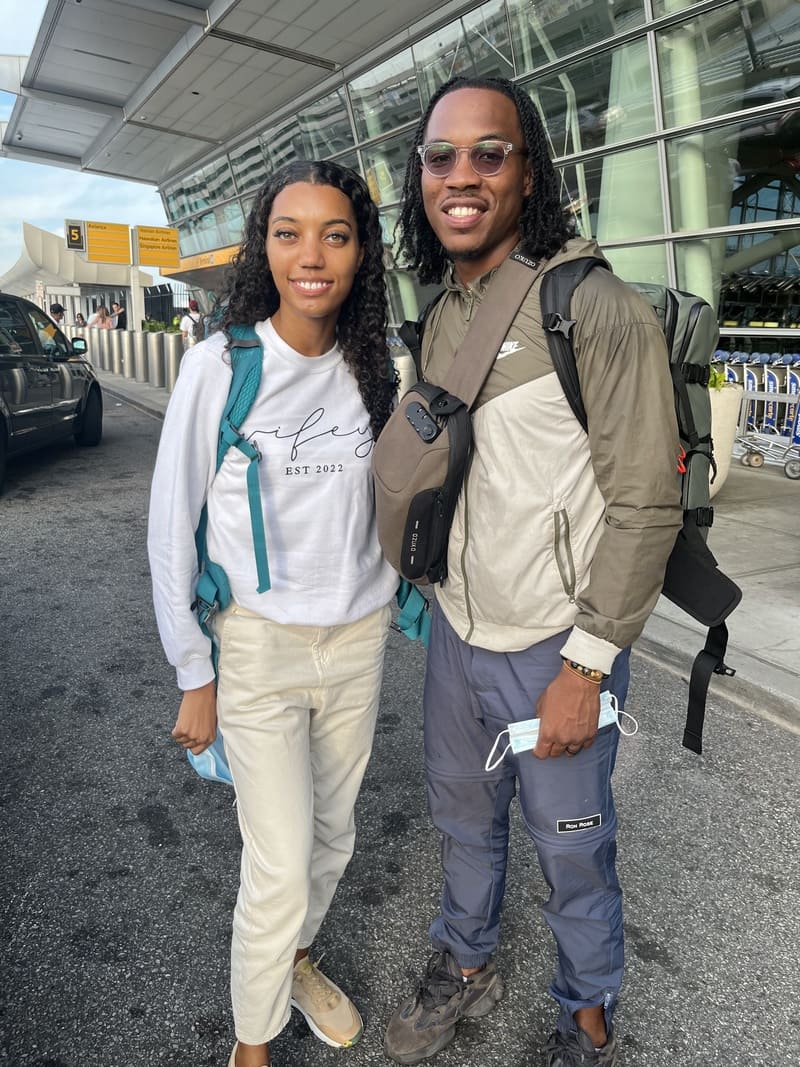
The signage in airports often includes not only words but also visual symbols.
Look out for universal symbols indicating baggage claim or taxi services, which can serve as visual cues to guide you in the right direction.
65. What to Know About International Customs
For first time flyers on international flights, it’s important to be aware of the customs procedures upon arrival at your destination.
Pay close attention to any signs or announcements that indicate the separate processes for domestic and international flights.
These guidelines will help you navigate through the appropriate security and customs areas smoothly.
Upon reaching customs, you may be asked a few questions by the customs officers.
These questions typically revolve around the purpose of your visit (usually tourism), the duration of your stay, your occupation back home, and occasionally the address of your accommodation in the country you are visiting.
You should have a specific local address prepared to provide to the customs officer in case they ask.
The customs procedures vary depending on the country you are visiting.
Some countries may stamp your passport, while others may not.
If you have Global Entry and are returning to the United States, it’s an even quicker process.
You’d approach a Global Entry kiosk, scan your passport, and that’s about it.
Once you have completed the customs process, you can proceed to the baggage claim area to collect your checked bags or exit the airport.
66. How Does Baggage Claim Work
Baggage claim is the area where you retrieve your checked bags after your flight. Right before you get off the plane, the flight attendant or pilot will usually announce which carousel the baggage from this flight is assigned to.
Once you arrive at the designated baggage claim area, you will see a carousel or conveyor belt where the bags are placed, and the carousel number or letter will be just above it.
Wait patiently until you spot your bag coming out on the carousel. Keep an eye out for your bag, and when you see it, approach it and safely grab it.
Make sure that it is, in fact, your bag and not a look alike. Double-check the luggage tag or your TILE to confirm.
Once you’ve gathered your bag and all your belongings, it’s time to leave the airport.

67. How to Figure Out Airport Transportation
When it comes to figuring out airport transportation, there are several options you can consider.
Here are some tips to help you navigate through this process as a first time flyer:
Hotel or Hostel Shuttle Service
If you have arranged for accommodation at a hotel or hostel, they may offer a shuttle service that picks you up from the airport.
Make sure to arrange this service in advance and have the details about the pickup location at the airport.
Car Rental
If you have opted for a car rental, you may find rental car companies located at the airport. Look for signs indicating the name of the car rental company.
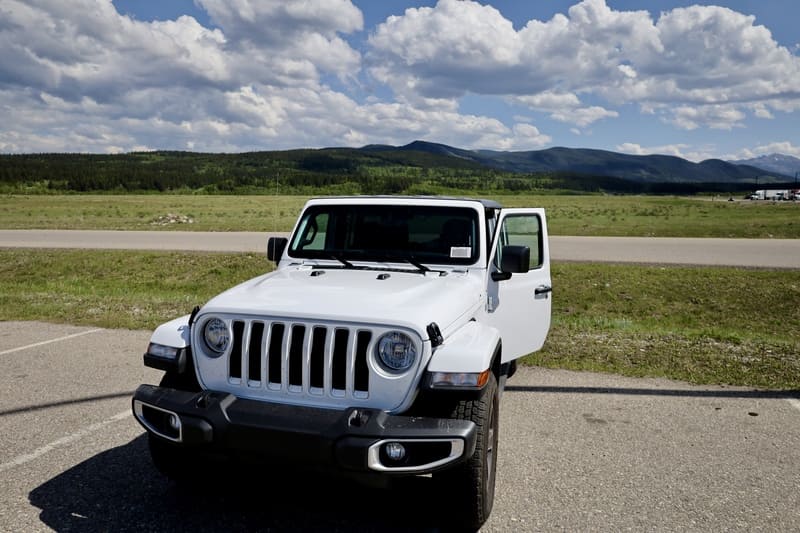
In case the rental service is off-site, they usually provide a shuttle service from a designated spot at the airport.
Familiarize yourself with these details beforehand to avoid any confusion upon arrival.
Local Buses and Trains
Research local transportation options in advance to see if they are convenient and cost-effective choices.
Take into consideration factors like safety, schedules, and cost to determine if they suit your needs.

Rideshare Services
Check if popular rideshare services like Uber or Lyft are available in the area.
Additionally, look for any local rideshare services such as Grab.
Keep in mind that rideshare availability may vary depending on the location.
Taxis
If you decide to take a taxi, ensure that you choose an official taxi and agree upon the fare before getting into the vehicle.
Shuttle to Nearby Locations
In some cases, getting picked up directly from the airport by a taxi or rideshare service can be expensive.
As an alternative, you can take a shuttle to a nearby hotel and then arrange for a taxi or rideshare service from there to your actual destination. This can sometimes be more cost-effective.
Ultimately, the choice of airport transportation depends on factors such as cost, convenience, safety, and availability.
By researching and planning ahead, you can make an informed decision and ensure a smooth transition from the airport to your final destination.
First Time Flyer FAQs
Where do I go when I first get to the airport?
Upon arriving to the airport, you should follow the signs or ask airport staff to guide you to the check-in counters. If you are already checked in and don’t have bags to check, follow the signs to security.
Where is the best place to sit on the plane for first time flyers?
For a smoother plane ride, you should sit near the wings.
How many blank visa pages do I need to travel?
The number of blank pages in your passport required for travel depends on the country you are visiting, but usually at least two to four pages should be blank.
Is flying for the first time scary?
Flying for the first time can be a mix of excitement and nervousness, but it is generally safe and routine.
How do you calm a first time flyer?
It’s helpful to learn about the flight process, familiarize yourself with safety procedures, and understand that turbulence is a normal part of flying.
What do I need to know before my first plane ride?
You’ll need to familiarize yourself with the airline’s baggage policies, security regulations, and check-in procedures. Ensure you have proper identification, pack travel essentials, and arrive at the airport with ample time.
Can you use your phone on the plane?
Yes, you can use your phone on the plane but it must be in airplane mode.
Final Thoughts: First Time Flyer Guide
There you have it, your ultimate airport guide for first time flyers!
These were the BEST tips for first time flyers, including most commonly asked questions by first time flyers.

It’s natural to have questions, concerns, and a mix of emotions as you prepare for takeoff.
However, you’re now prepared with the knowledge and tips shared in this first time flyer guide.
You can navigate the world of air travel with confidence. Remember to plan ahead, arrive early, and familiarize yourself with the airport procedures.
From packing smartly and understanding security protocols to knowing what to expect during the flight and upon arrival, this first time flyer guide has covered the essentials to ensure a smooth journey.
So, take a deep breath, embrace the excitement, and get ready to head out on a remarkable adventure.
Remember, flying opens up a world of possibilities, connecting you to new destinations, experiences, and memories.
Be sure to share this article with other travelers preparing for their first time flying, as well!


Good article.
Thank you, I appreciate you checking it out!